Configuring Windows Server for iSCSI with NGX Storage Unified Series

This guide provides an overview of configuring iSCSI on Windows systems, including best practices. In this example, we will demonstrate the configuration process using Windows Server 2019, but these steps can also be applied to other versions of Windows Server. It is important to note that when following the instructions in this document, you should replace the IP addresses and IQNs with those specific to your own environment
Windows Server Configuration
1. Before proceeding, ensure that you are following NGX Storage Microsoft Windows Best Practices .
2. In Server Manager, click “Tools” and select “iSCSI Initiator” to open the iSCSI Initiator Service.
3. Click Tools and select iSCSI Initiator to start the iSCSI Initiator Service.
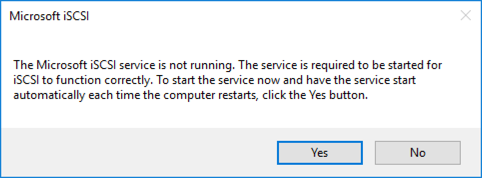
4. The Microsoft iSCSI dialog will open, indicating that the service is not currently running. Click “Yes” to start the service and set it to start automatically on server reboot.
NGX Storage iSCSI Target Configuration
1. From each controller at least 1 IP, a total of 2 IP addresses should be assigned for iSCSI connectivity.
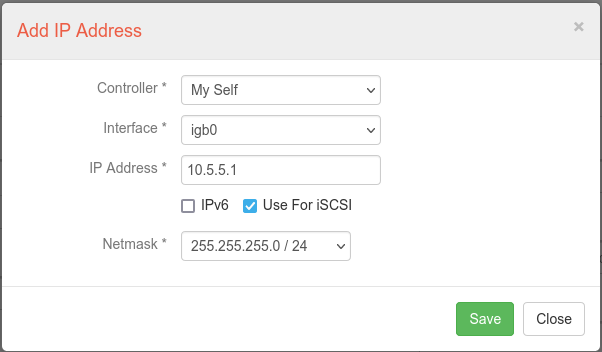
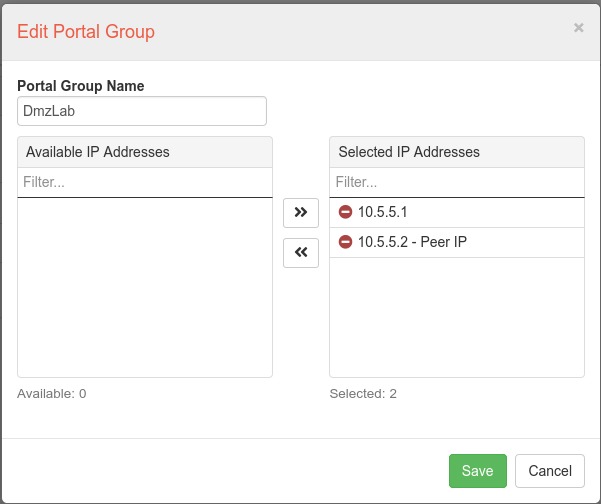
2. Add a new portal group under SAN->Portal Group section.
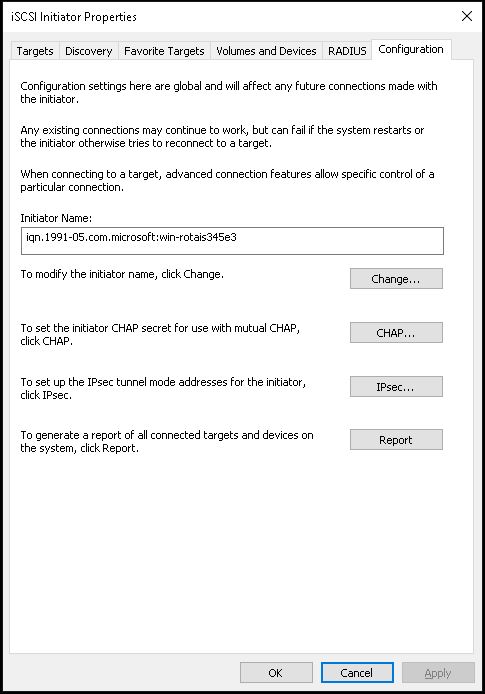
3. Click the Configuration tab at Windows Server iSCSI menu to retrieve the iSCSI Qualified Name (IQN).
4. Add a new auth group under SAN-> Authentication Groups section.
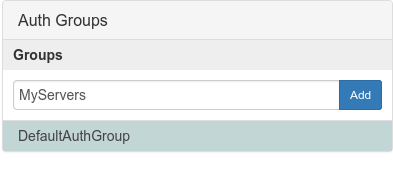
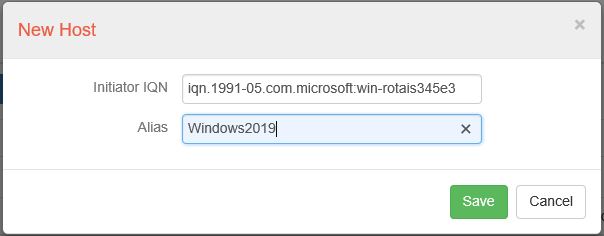
5. Configure auth group with collected Windows IQN:
6. Map LUNs to target under SAN-> iSCSI Targets menu:
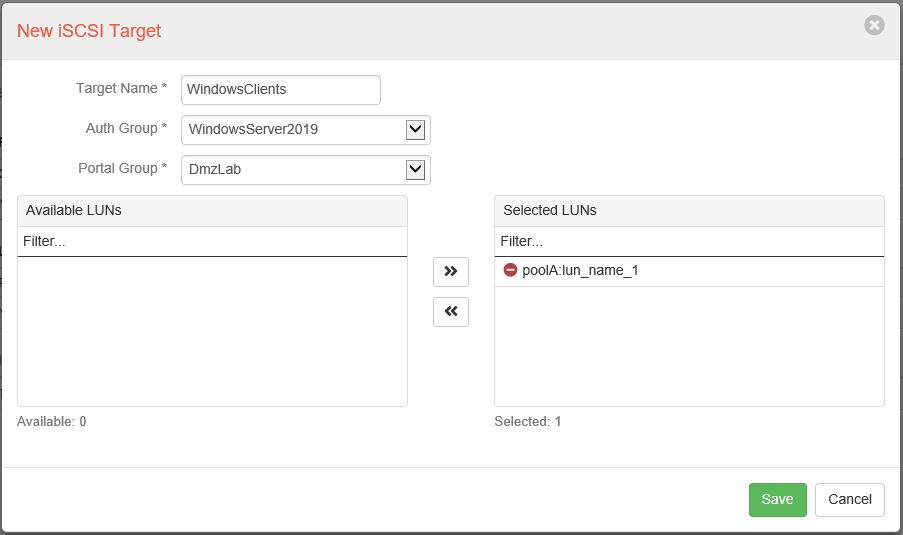
Now, you can see iSCSI target information from the GUI:

Activating MPIO on Windows Server 2019
In order to activate MPIO on Windows Server 2019, should complete the following steps. This procedure is similar to the other versions of the Windows Servers such as 2012R2, 2016 and so on.
- Log in to Windows Server 2019 as an administrator.
- Open Server Manager.
- From the dashboard, click “Add Roles and Features“.
- The “Add Roles and Features Wizard” will open. In the “Features” section, locate the “Multipath I/O” feature.
- Click “Next” and then “Install” to activate MPIO.
Configuring MPIO for iSCSI
You should apply multipath support to iSCSI devices. For this configuration, complete following steps on Windows Server 2019.
- Log in to Windows Server 2019 as an administrator.
- Start Server Manager
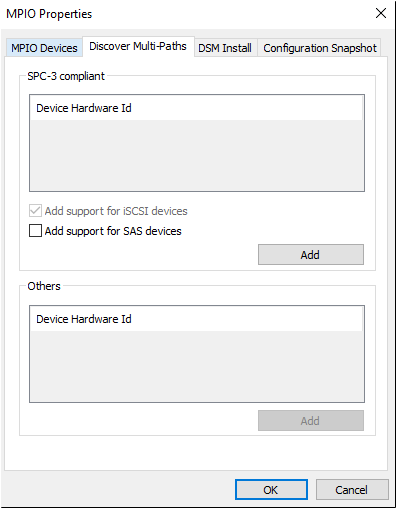
- From the Tool section, click on MPIO.
- From Discover Multi-Paths tab, check Add support for iSCSI devices and click Add button.
- By restarting the Windows Server, the MPIO device is listed under MPIO Devices tab.
Configuring Microsoft iSCSI
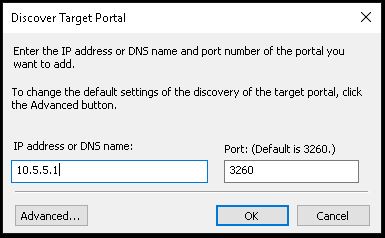
1. Enter the IP Address or DNS name for the target ports on the NGX Storage. Leave the Port default set to 3260.
Repeat this step for each iSCSI service ip you have configured on the NGX Storage. In this example we have two IP.
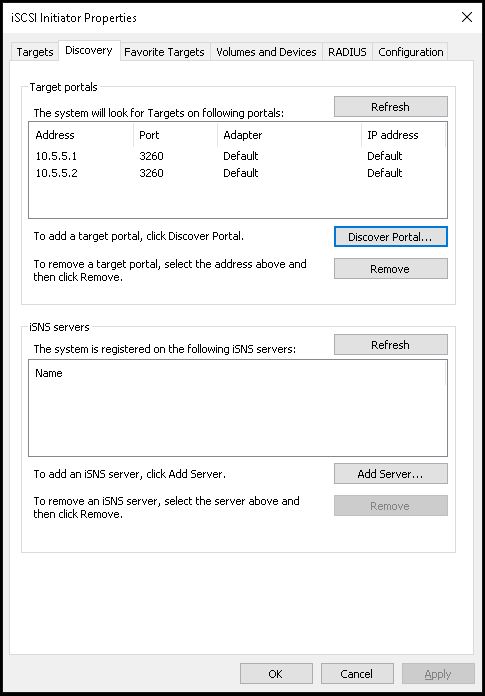
2. Once you have configured all of the Target Ports, the Discovery tab should resemble the example below. Please note that the number of iSCSI initiators in your NGX Storage may result in a different appearance.
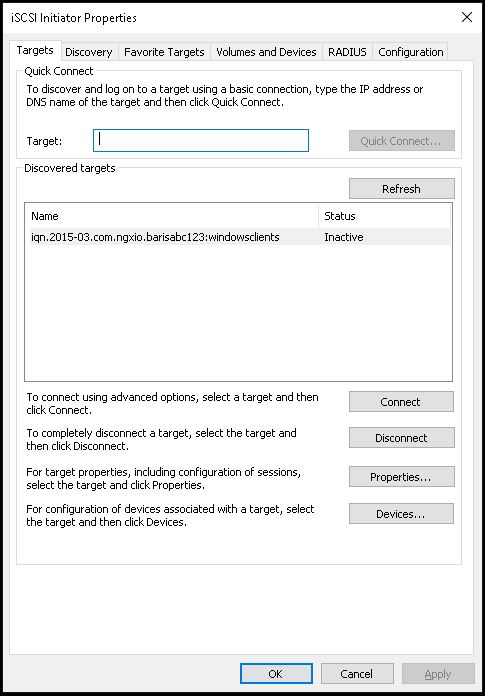
3. Click on the Targets tab select the newly Discovered target and click the Connect button. This will establish a connection to the NGX Storage iSCSI services.
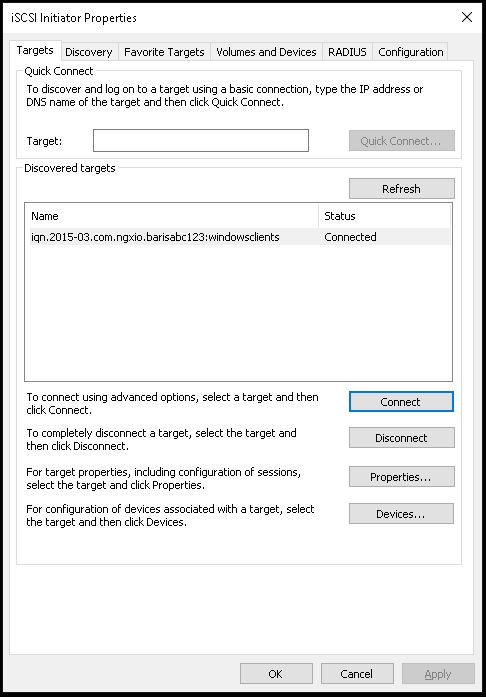
After connecting the Status will show as Connected.
4. Select the newly connected Discovered target and click the Properties… button to add sessions to the connection.
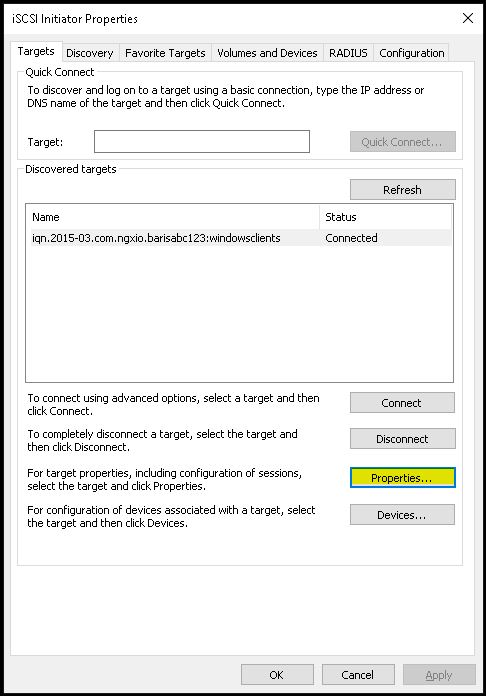
When the Properties dialog open, Click Add session button. This will open up the Connect to Target dialog.
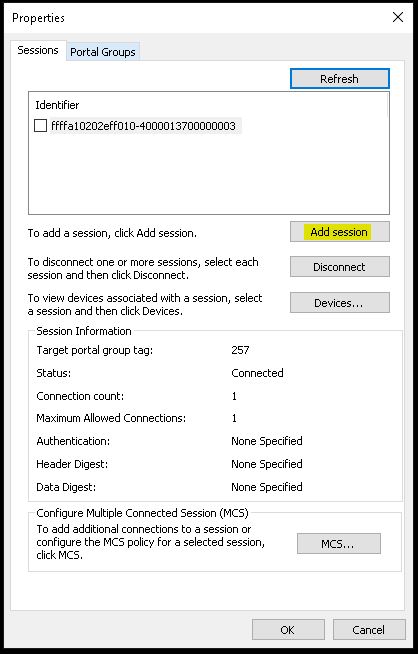
Click Enable multi-path then click Advanced… button.
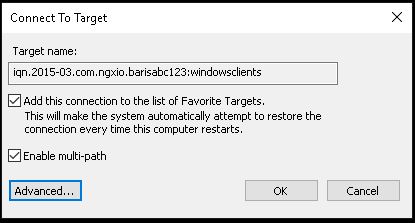
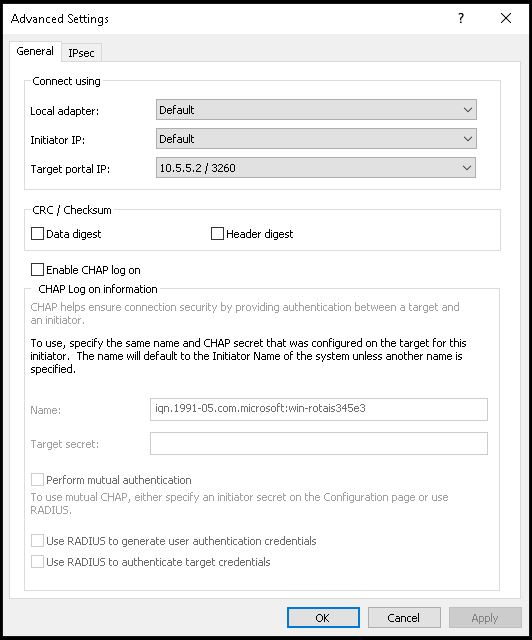
In the Advanced… settings dialog select the Microsoft iSCSI Initiator from the Local adapter dropdown. Select the appropriate IP Address from the Initiator IP dropdown. Select the Target portal IP from the dropdown that will map to the Initiator IP. Repeat this step for all of the IPs and map to their appropriate Target portal IP.
5. From Windows Computer Management, click the Disk Management dialog to find new iSCSI drive.
Right click to located new disk to check MPIO settings from Properties section.

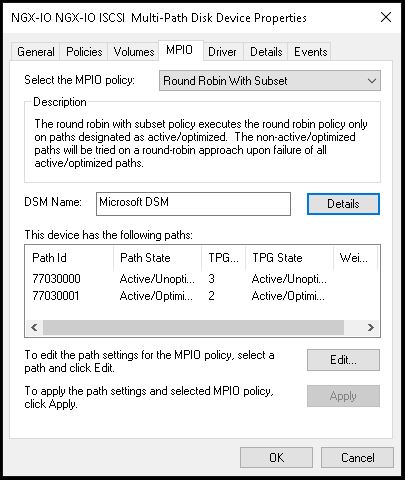
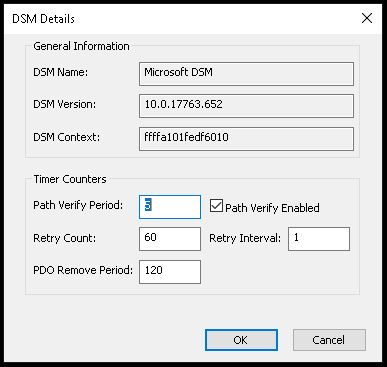
Click Details dialog for Microsft DSM and change settings according to NGX Storage recommended values and click OK.
6. You can online and initialize your new disk as usual now.
COPYRIGHT
© 2023 NGX Teknoloji A.Ş. (NGX Storage). All rights reserved. Printed in the Turkey. Specifications subject to change without notice. No part of this document covered by copyright may be reproduced in any form or by any means-graphic, electronic, or mechanical, including photocopying, recording, taping, or storage in an electronic retrieval system-without prior written permission of NGX Storage. Software derived from copyrighted NGX Storage material is subject to the following license and disclaimer:
THIS SOFTWARE IS PROVIDED BY NGX Storage “AS IS” AND WITHOUT ANY EXPRESS OR IMPLIED WARRANTIES, INCLUDING, BUT NOT LIMITED TO, THE IMPLIED WARRANTIES OF MERCHANTABILITY AND FITNESS FOR A PARTICULAR PURPOSE, WHICH ARE HEREBY DISCLAIMED. IN NO EVENT SHALL NGX Storage BE LIABLE FOR ANY DIRECT, INDIRECT, INCIDENTAL, SPECIAL, EXEMPLARY, OR CONSEQUENTIAL DAMAGES (INCLUDING, BUT NOT LIMITED TO, PROCUREMENT OF SUBSTITUTE GOODS OR SERVICES; LOSS OF USE, DATA, OR PROFITS; OR BUSINESS INTERRUPTION) HOWEVER CAUSED AND ON ANY THEORY OF LIABILITY, WHETHER IN CONTRACT, STRICT LIABILITY, OR TORT (INCLUDING NEGLIGENCE OR OTHERWISE) ARISING IN ANY WAY OUT OF THE USE OF THIS SOFTWARE, EVEN IF ADVISED OF THE POSSIBILITY OF SUCH DAMAGE.
NGX Storage reserves the right to change any products described herein at any time, and without notice. NGX Storage assumes no responsibility or liability arising from the use of products described herein, except as expressly agreed to in writing by NGX Storage. The use or purchase of this product does not convey a license under any patent rights, trademark rights, or any other intellectual property rights of NGX Storage.
TRADEMARK
NGX Storage and the NGX Storage logo are trademarks of NGX TEKNOLOJI A.Ş. Other company and product names may be trademarks of their respective owners.